Are you wondering how to receive Alipay payments in WordPress?
Alipay is a digital wallet based in China with over 1 billion active users. Accepting Alipay payments on your WordPress site means you open the door to a broader audience, potentially increasing your sales.
In this article, we will explain how to accept Alipay payments in WordPress. That way, you can tap into a large market of users who prefer using this payment method.

Why Should You Accept Alipay Payments in WordPress?
Alipay is a payment app that allows users to send and receive money online. It is a dominant player in the Chinese market and is now gaining popularity in Singapore, Malaysia, Hong Kong, and across the world.
It’s also not just used by international users. Many domestic dropshipping stores that buy products wholesale use Alipay as well. That’s because Alipay is the primary payment method for Alibaba and AliExpress, which are two eCommerce giants.
Alipay is well on its way to serving over 2 billion customers worldwide, so adding it as a payment option will help you tap into a huge market and attract customers from regions where Alipay is popular.
That being said, let’s dive into the 2 ways you can accept Alipay payments. You can use our links to jump to skip ahead to the method you prefer:
Method 1: Easily Collect Alipay Payments With WP Simple Pay (Recommended)
For this method, we will use WP Simple Pay, which is the best Stripe payment plugin on the market. With this plugin, you can accept payments without needing to set up any complicated APIs on your site.
WP Simple Pay integrates into Stripe’s payment options, which allows businesses using Stripe to accept payments from customers who want to pay with Alipay.
The good news is you can use WP Simple Pay Lite since it can accept Alipay payments. Best of all, it’s 100% free.
Note: You will need WP Simple Pay Pro for access to the Alipay payments form. With the free version, you can only create an Alipay payment button to add to your pages. Also, you won’t be able to build on-site payment forms without the paid plan.
For most businesses, we recommend WP Simple Pay Pro. This paid version accepts 10+ payment methods and offers recurring payments, buy now, pay later plans, and an advanced form builder.
For this tutorial, we will be using the Pro plan so that we can build a payment form to accept Alipay payments. The process is the same with the free plan, but you will have access to fewer features.
Step 1: Install and Activate WP Simple Pay
To begin, you’ll need to install and activate the WP Simple Pay plugin. If you need help, read our tutorial on how to install a WordPress plugin.
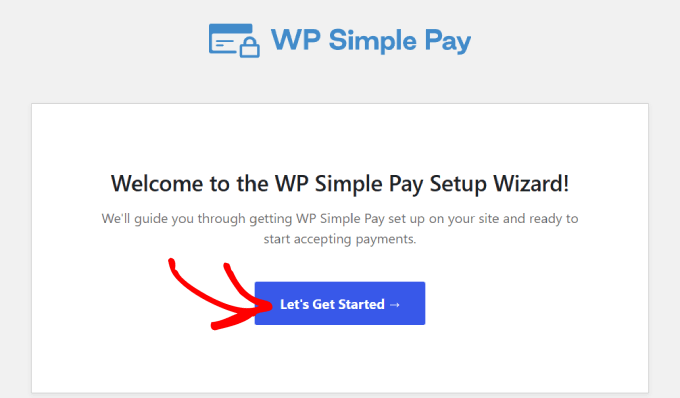
Upon activation, the plugin will automatically launch the WP Simple Pay setup wizard. You’ll need to click on the ‘Let’s Get Started’ button.
Step 2: Complete the Setup Wizard
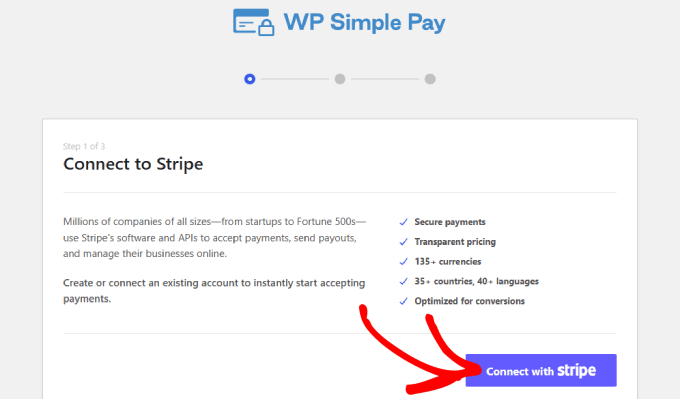
You’ll be taken to the next step in the process. From there, you’ll have to create a new Stripe account or connect to an existing one. Click the ‘Connect with Stripe’ button to move to the next screen.
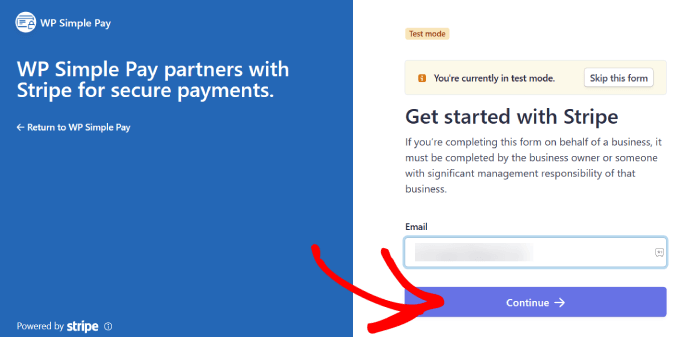
Assuming you already have a Stripe account, you can type in your email address and click the ‘Continue’ button.
It will integrate your Stripe data into your site. That way, all of the payments you receive will go to your Stripe account.
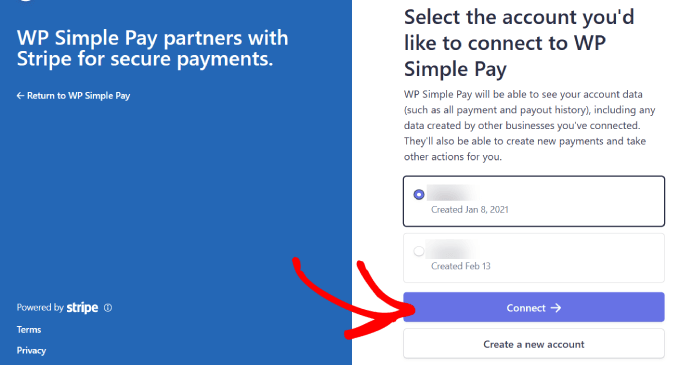
From here, you’ll be prompted to select your Stripe account.
Then hit ‘Connect.’ Or you can choose to create a new account instead.
Step 3: Create a Form to Accept Alipay Payments
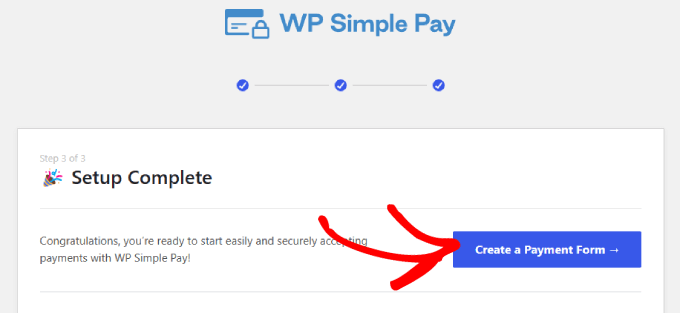
Once you’ve connected your Stripe account, you will need to create a payment form.
Go ahead and click the ‘Create a Payment Form’ button.
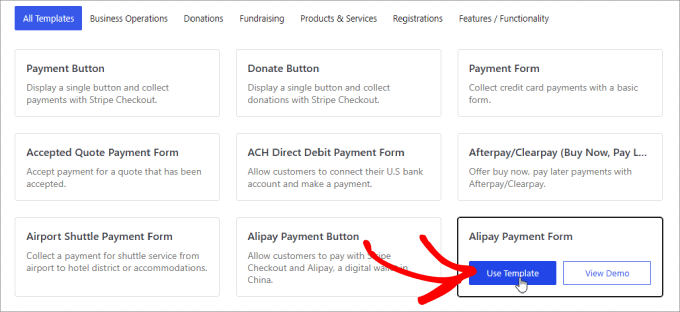
You will land on a template library where you can pick one from the many pre-built templates for your form.
Next, look for the ‘Alipay Payment Form’ and click on ‘Use Template.’
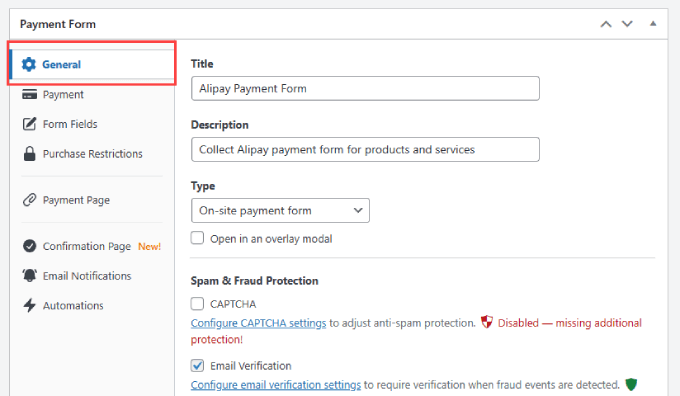
As soon as you choose the template, you will be taken to an intuitive drag-and-drop builder.
You will also be prompted to configure the General settings. This is where you will customize the title, description, form type, and more.
There are also options to add a CAPTCHA and email verification button to prevent fake orders.
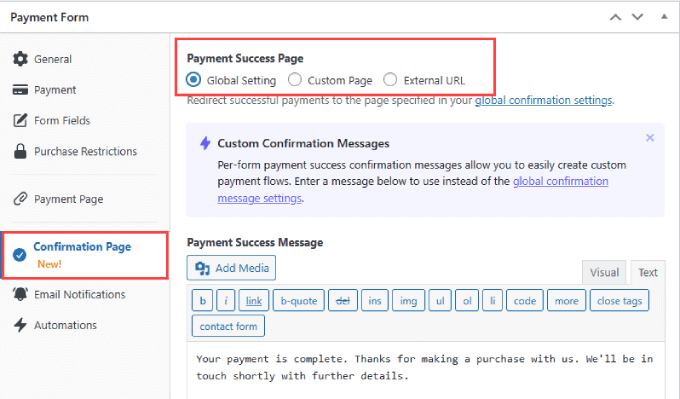
If you go to the ‘Confirmation Page’ tab, you can configure where you direct users when they complete the form.
By default, WP Simple Pay will show a custom success page when a customer makes a payment. But you can select ‘Custom Page’ if you’d like to show a different page hosted on your WordPress site. This is a great opportunity to send them to a thank you page and even upsell them on more products or services.
Or, if you prefer to redirect customers to an external page, you can select ‘External URL.’ You can also add a ‘Payment Success Message’ to thank customers and tell them what they can expect from you next.
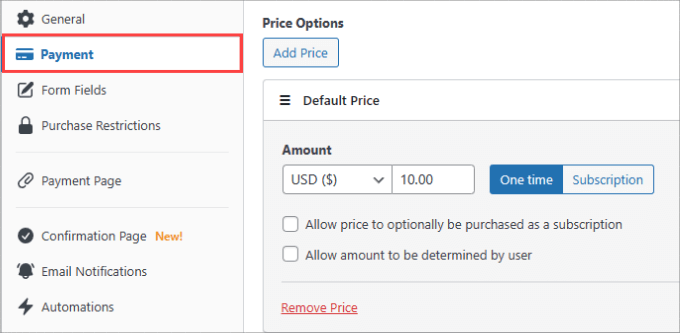
After that, you need to go to the ‘Payment’ tab on the left.
This is where you will set the ‘Default Price.’
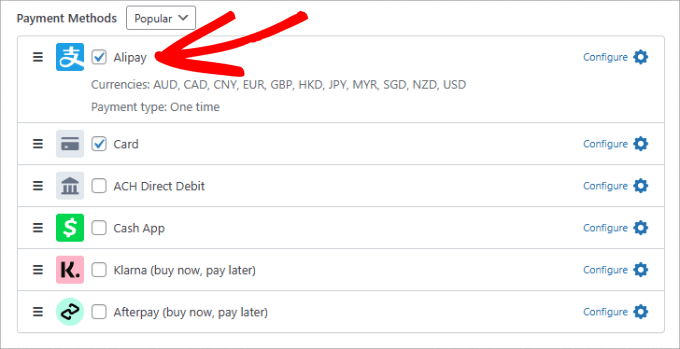
And under the ‘Payment Methods,’ be sure to check off the box next to Alipay to begin accepting Alipay payments on your site.
You can also choose other payment methods, such as a Card or ACH direct deposit. If you have WP Simple Pay Pro, you will have full access to 13 payment methods, including Apple Pay, Google Pay, Afterpay, Klarna, Cashapp, and more.
Then, go to the ‘Form Fields’ tab on the left. Here, you can add or change any existing form fields.
All you need to do is hit the dropdown menu under ‘Form Fields’ and click ‘Add Field.’
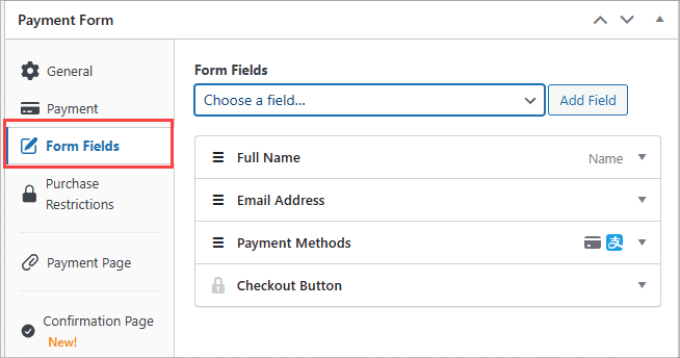
You have plenty of options to choose from, such as phone, address, coupon, and more.
Step 4: Publish Your Alipay Form
Once your form is ready to go, make sure to save your changes. Next up, you are ready to publish and embed your Alipay payments form on your site.
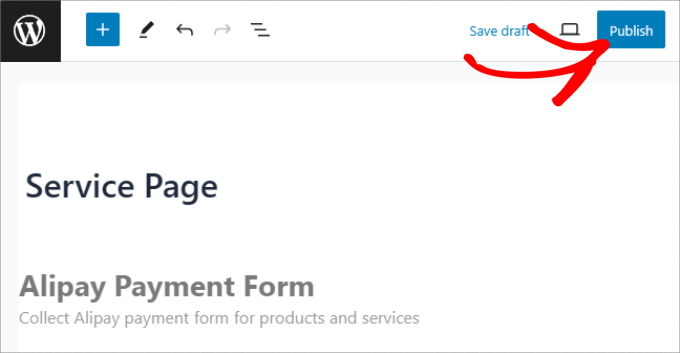
Go ahead and click the ‘Publish’ button on the right side.
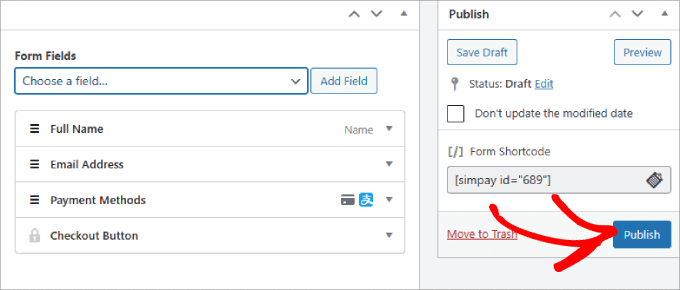
Now, you will need to embed the form in your WordPress website. Just go to the post or page where you want to include your form. This could be a services page, a product page, or anywhere else.
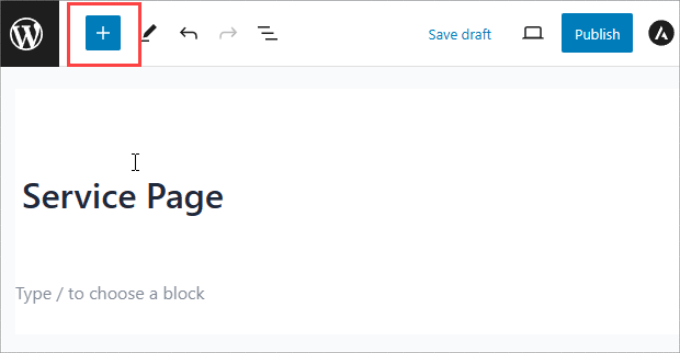
On the top left corner, hit the ‘+’ button.
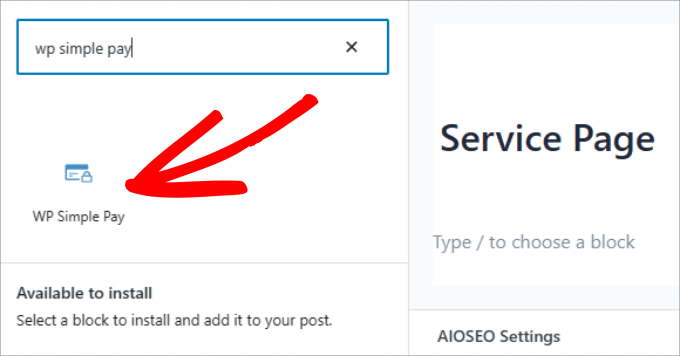
Search for the WP Simple Pay block to add it to your page.
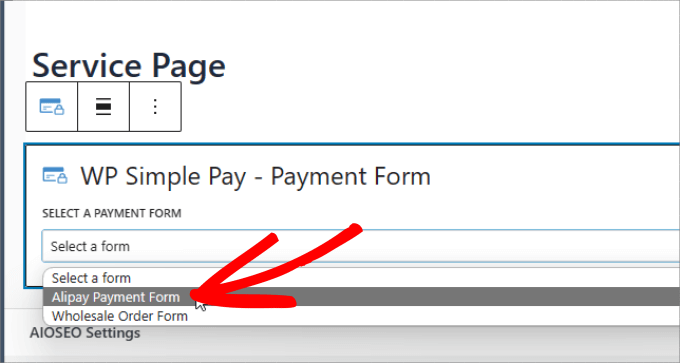
You’ll see the block appear in the block editor.
In the dropdown menu, simply select the Alipay payment form you’ve just created.
You will see the form embedded into your page.
Finally, hit ‘Publish’ or ‘Update.’
There you have it. Now you know how to easily collect Alipay payments on your WordPress site.
Don’t forget to test the form to ensure payments are going through.
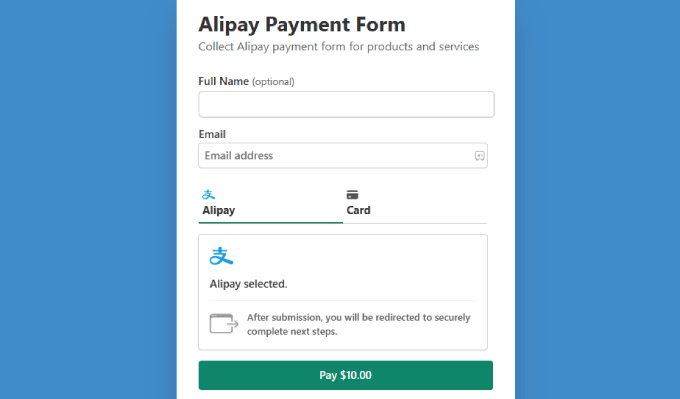
Here’s an example of what the form should look like:
Method 2: Accept WooCommerce Alipay Payments With Stripe Payment Gateway Plugin
If you run a WooCommerce store, then you may want to use a payment plugin instead. While you can add a WP Simple Pay button or form to your product pages, it may not embed into the form as seamlessly.
With a WooCommerce plugin, Alipay will integrate smoothly into the payment page as a checkbox that customers can tick off during the checkout process.
Step 1: Install the WooCommerce Stripe Plugin
To get started, you will need to download the free WooCommerce Stripe plugin. This plugin will redirect users to the Alipay payment page, where they can log in and authorize the payment.
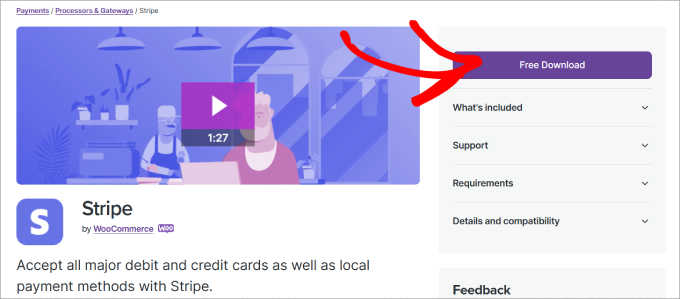
Go to the WooCommerce Stripe plugin page and click on ‘Free Download.’
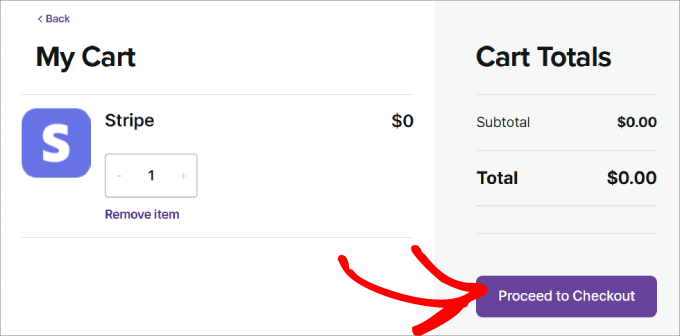
From here, you will be directed to the cart page.
Check that the order details are correct and hit ‘Proceed to Checkout.’
You’ll be taken to the checkout page. All you need to do is enter your name and email address.
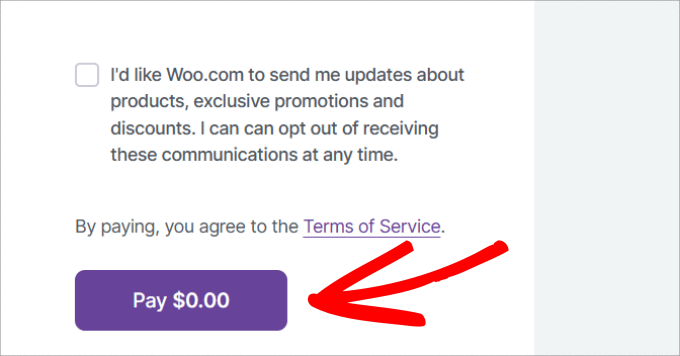
After that, just click on the ‘Pay $0.00’ button.
You’ll be directed to the thank you page.
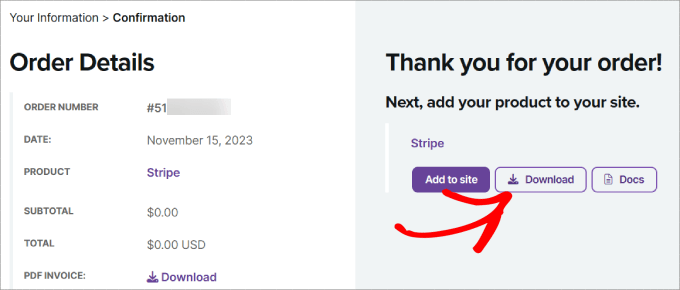
Just click the ‘Download’ button so you can download the plugin files to your computer.
From here, all you need to do is install the WooCommerce Stripe plugin by uploading it to WordPress. If you need help, you can follow our step-by-step guide on how to install a WordPress plugin.
Step 2: Enable Alipay in WooCommerce
Upon activation, you need to head over to WooCommerce » Settings in your WordPress dashboard. Then go ahead and navigate to the ‘Payments’ tab.
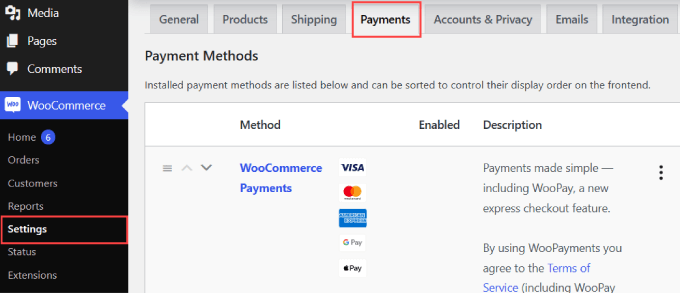
If you scroll down the page, you will find ‘Stripe Alipay’ as a payment method.
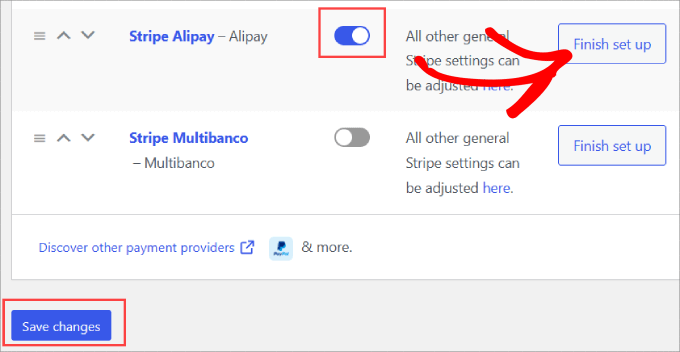
Simply toggle on the button to enable Alipay for your WooCommerce site. Click on ‘Save changes’ at the bottom.
Then go ahead and click ‘Finish set up’ next to the Alipay option.
Step 3: Add Your Stripe Account
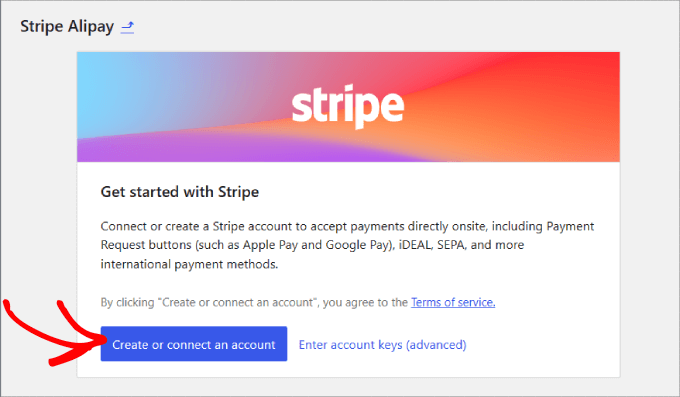
You will now be asked to integrate your Stripe account.
Just hit the ‘Create or connect an account button’ to add your Stripe account to WooCommerce.
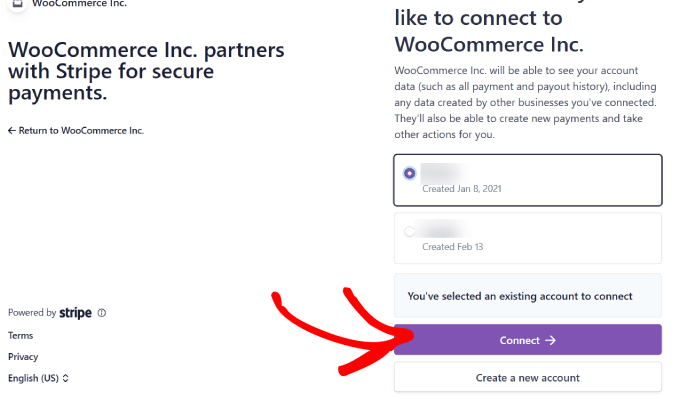
All you have to do is choose your Stripe account and click ‘Connect.’
If you don’t have a Stripe account yet, then you can select ‘Create a new account.’
Step 4: Activate Alipay
Now, your Stripe account is fully connected to your online store.
You will need to go back to the ‘Payments’ tab. Next to the ‘Stripe Alipay’ method, click on ‘Manage.’
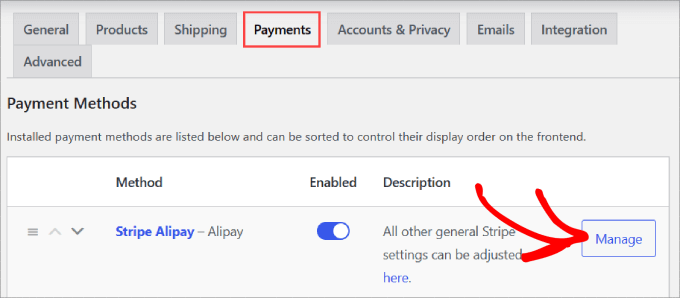
This is where you will be able to configure the Alipay settings, such as the name and description that appear on your checkout page.
Go ahead and click on the ‘Activate in your Stripe Dashboard link.’
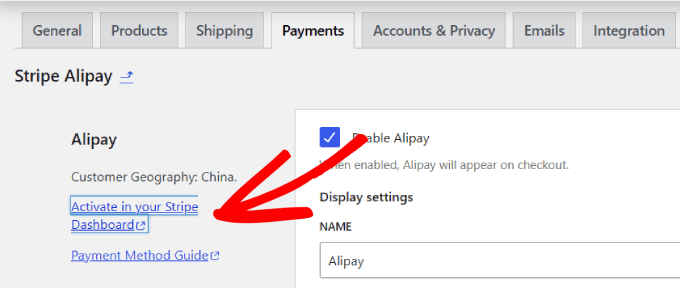
You will be directed to your Stripe account’s payment method tab in the settings.
Scroll down to find ‘Alipay,’ and next to it, click on ‘Request access.’
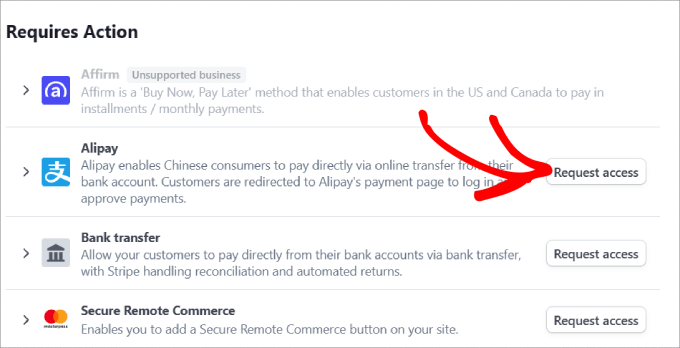
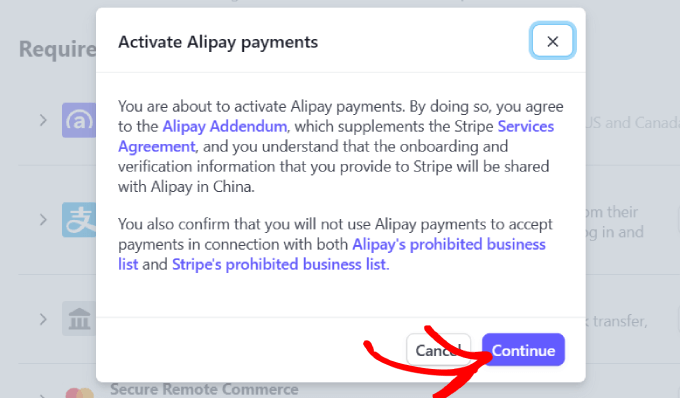
From here, a popup message will appear asking if you want to activate Alipay payments.
Simply hit the ‘Continue’ button to accept Alipay payments in your WooCommerce store.
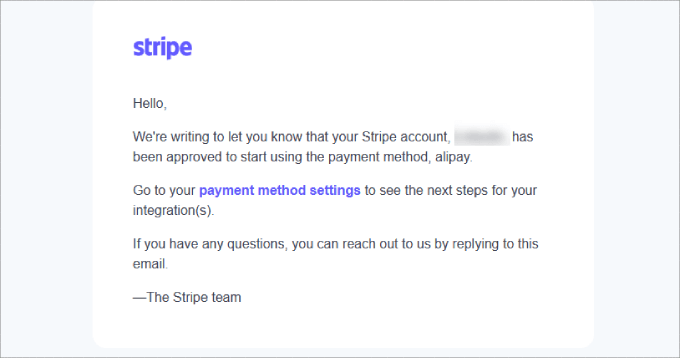
After you’ve requested access, you need to wait for Stripe to approve your account. It should take about 1-2 business days before you can begin accepting Alipay payments.
When you are approved, you should receive an email from Stripe letting you know that Alipay has been activated for your Stripe account.
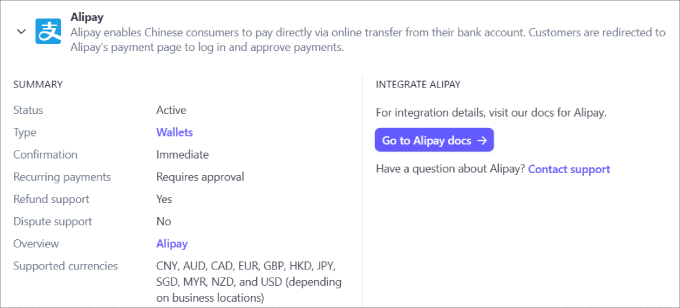
On top of that, you will want to go to your Stripe account’s payment methods and make sure that it doesn’t say ‘Pending’ next to Alipay.
Otherwise, you’ll have to wait until Stripe approves your request.
Now, all you need to do is check that the Alipay method appears at checkout for your customers.
Go to any product page and go through the checkout progress. Under the order summary, you should see an option for customers to pay with Alipay.
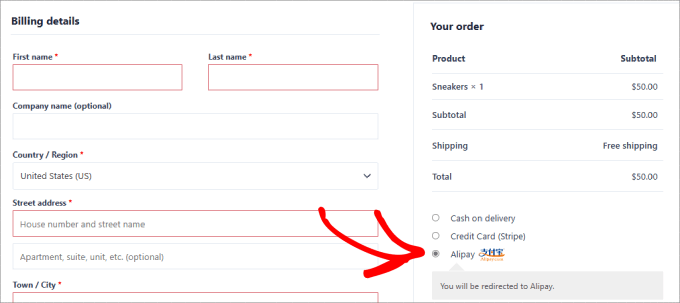
When the customer places an order, they should be sent directly to the Alipay login page. That is where they can log in to their Alipay account and finalize their payment.
Then, the money goes straight into your Stripe account through the integration.

There you have it! Now, you are ready to accept Alipay payments in your WooCommerce store.
We also recommend adding other WooCommerce payment gateways, such as PayPal and Square, to give customers more options to choose from.
We hope this article helped you learn how to accept Alipay payments in WordPress. You may also want to see our guide on how to easily accept credit card payments in WordPress and our picks for the must-have WordPress plugins and tools for business sites.
If you liked this article, then please subscribe to our YouTube Channel for WordPress video tutorials. You can also find us on Twitter and Facebook.


Ralph says
This is great detailed guide even for such a novice blogger like me. I wouldn’t want another plugin, but you guys always take care of us and give us alternatives. Good to know I can accept alipay with stripe plugin as I already use it anyway
Syed Balkhi says
Hey WPBeginner readers,
Did you know you can win exciting prizes by commenting on WPBeginner?
Every month, our top blog commenters will win HUGE rewards, including premium WordPress plugin licenses and cash prizes.
You can get more details about the contest from here.
Start sharing your thoughts below to stand a chance to win!